The cloudscribe Query Tool component enables querying the database through an administrative web page within your site, and provides an easy way to configure saved queries as API endpoints.
This page explains how to use the tool (for site administrators), and for developers it explains how to set up the Query Tool in a new cloudscribe .NET project, and how to wire it up retrospectively in an existing cloudscribe project.
Introduction
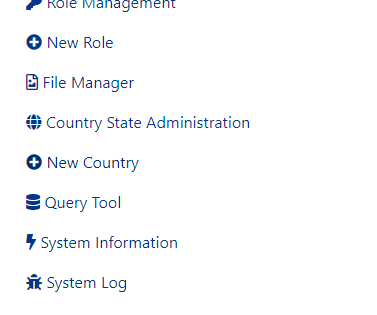
Query Tool is simple SQL query generator which lets site administrators run SQL queries against the cloudscribe database right from the cloudscribe administration pages, and, optionally, create API endpoints for accessing the queried data. It is handy where you do not have direct access to the database via a third party tool such as SSMS or PgAdmin. Once installed and configured, Query Tool is available from the main Administration page:
Query Tool will enumerate all available tables in your database, and for each table it will also enumerate all of the columns and their types. It then presents these as drop down lists, which you can use to help you build your queries. You can choose a table from the first drop down list. This will update the Columns list below that to show the columns in that table. You can select one or more columns from this list. (Hint: use CTRL click on each item you want from the list). Once you have a table and some columns selected then you can use the simple query building tools to construct a query.
Permissions
The permissions of the Query Tool are determined by the permissions granted via its specific database connection string. The Query Tool uses its own connection string, which needs to be configured in your appsettings.json file (or better appsettings.Production.json). You should probably use a different username/password from the main cloudscribe application, and restrict permissions for the Query Tool login/user appropriately; for example you might enable only read permissions, or only read/write, and disallow DDL commands like 'DROP', 'ALTER' etc.
Constructing SQL Queries
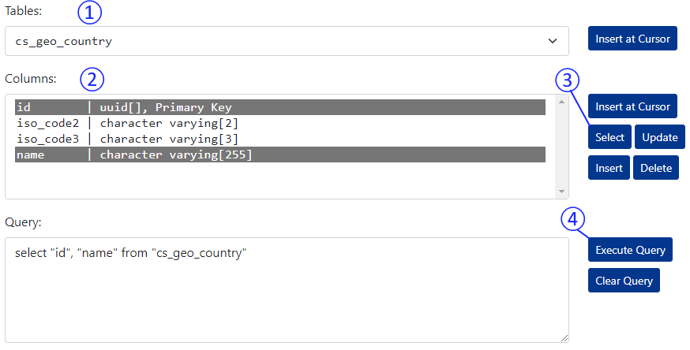
- Select a table from the drop down list.
- Optionally select some columns from the list.
- Hit the 'Select' button to generate the SQL query in the Query box.
- Hit 'Execute Query' to run the SQL query.
If no columns are selected from the Columns drop down then all columns will be selected in the query (the SQL query will be 'select * from tablename').
The other action buttons 'Update', 'Insert' and 'Delete' create placeholder SQL only. You will still need to fill in some values to complete the expression.
The 'Insert at Cursor' button inserts the selected Columns (or Table) at the current position of the cursor in the Query box.
Multiple queries
The Query box can contain more than one query. Normally only the first query in the box will return any results. You can however highlight any of the text in the box and the query tool will try and run that as a query, as it would in a SQL Server Management Studio or PG Admin query window.
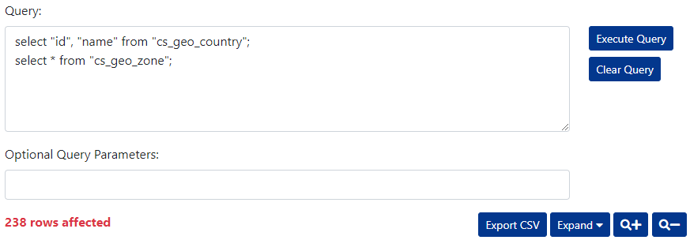
select "id", "name" from "cs_geo_country";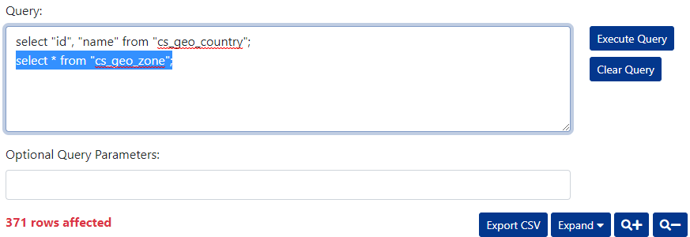
select * from "cs_geo_zone";Working with results
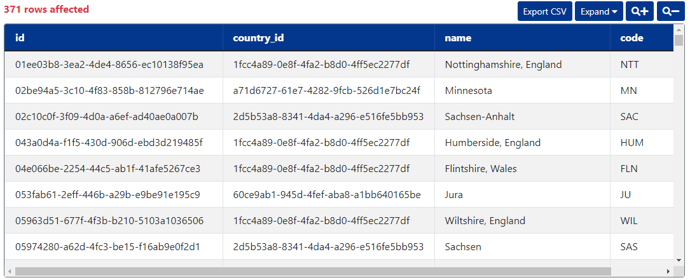
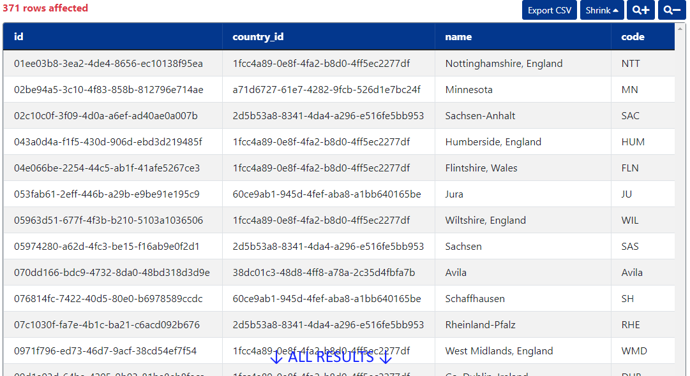
Once you have some query results you can export them to CSV using the 'Export CSV' button. The results window, by default, is limited in height and provides a scroll bar for scrolling through the results vertically and horizontally.
Saving queries & API endpoints
Once you have written a query and run it for the first time, you are given the option to save it.
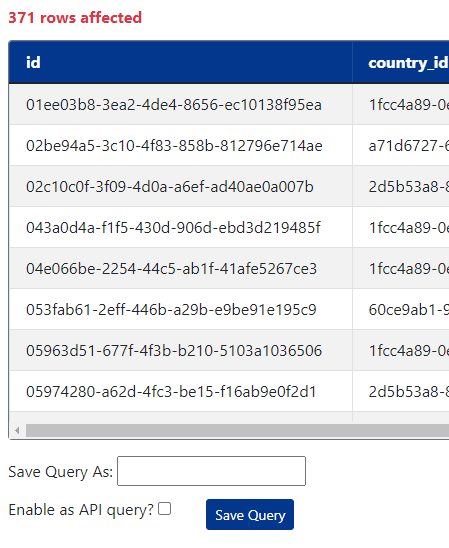
Choose a name for the query. If you choose the same name as an already saved query then it will be overwritten. Tick the 'Enable as API query?' box if you want this query to be available through the Web API.
Any query that you enable as an API query will be available on a special URL endpoint. You must meet the requirements of the 'QueryToolApiPolicy' role in order to access the API endpoints - see below.
Example:
A saved query called 'FetchCountries' would be available at the endpoint:
https://yourhost.com/api/QueryTool/FetchCountries
The API response would be the results of the query, formatted as either JSON, XML or CSV depending on any HTTP Accept header sent. The following Accept headers are valid:
- text/json
- application/json
- text/xml
- application/xml
- text/csv
JSON will be returned if no accept header is present in your API request.
Writing and saving parameterised queries & API endpoints
select * from "cs_geo_country" where iso_code2=@iso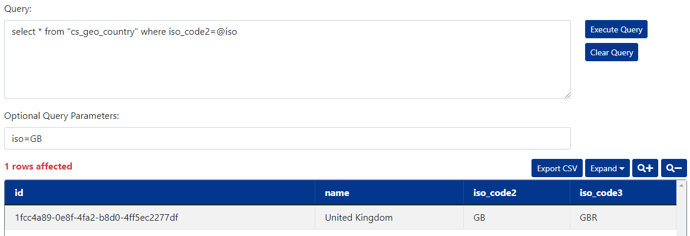
https://yourhost.com/api/QueryTool/FetchCountry?iso=FR
Result:
[
    {
        "id": "4f660961-0aff-4539-9c0b-3bb2662b7a99",
        "name": "France",
        "iso_code2": "FR",
        "iso_code3": "FRA"
    }
]
Multiple parameters can be defined in the query and provided in the API request.
Example Query:
select * from "cs_content_history" where author=@author and is_published=(@ispublished='0')
Query parameters (for testing):
author=Joe Bloggs&ispublished=0
Save as an API Query called 'ContentHistory' and now try it out:
Example API URL:
https://yourhost.com/api/QueryTool/ContentHistory?author=Joe%20Bloggs&ispublished=0
Example Result:
[
{
"id": "88e9fd97-de70-4f14-8c62-52fdefc5abcd",
"content_id": "c870211e-66af-4790-92b8-c367ddd6abcd",
"project_id": "92ef765c-c267-4edf-8eab-17de74daabcd",
"content_source": "Page",
"content_type": "html",
"slug": "google-analytics-ga4-integration",
"is_draft_hx": "False",
"was_deleted": "False",
"archived_utc": "2/15/2023 10:05:19 AM",
"archived_by": "Jane Bloggs",
"title": "Google Analytics 4 Integration",
"author": "Joe Bloggs",
"correlation_key": "",
"content": "<p>In cloudscribe Core we used the <a href=\"/docs/easy-google-analytics\">GoogleAnalyticsTagHelper, GoogleAnalyticsHelper, and GoogleAnalyticsApiService</a> provided by the cloudscribe.Web.Common library to track basic things like page views and also to track user account events such as Login Submit, Login Success, Login Failure, Registration Submit, Registration Success, and Registration Failure. We also tracked whether the login
... etc.
Things to note
Parameters passed in are always treated as strings, so if you want to do a boolean comparison (as in the example above), or another data-type, you may need to cast to the right type or build a suitable test expression. e.g. (@ispublished='0') will return true or false for the boolean field 'is_published'.
Missing parameters are passed into the query as NULL. So if you want to evaluate a missing parameter as meaning 'anything goes', write your query SQL to handle NULL accordingly; for example you might say WHERE MyField LIKE '%' + COALESCE(@search,'%') + '%' to find all records if a search value is not specified.
Loading saved queries

Any saved queries can of course be loaded back into the Query box again. Just choose the named query from the drop down list and hit the 'Load Saved Query' button. You can also delete any saved queries by choosing them from the list and hitting 'Delete Saved Query'.
Adding Query Tool to new cloudscribe projects
This section is aimed at developers looking to add the Query Tool to a new cloudscribe project, or to retrofit it to an existing cloudscribe project.
For new projects there is a new option in the cloudscribe project template for Visual Studio, and also in the dotnet CLI command template for creating a new cloudscribe project.
Visual Studio
Make sure that you have the cloudscribe project template VSIX extension installed into Visual Studio, from Visual Studio Marketplace
Create a new project of type 'cloudscribe' and when the options dialog appears select Query Tool. The database type must be something other than NoDb.
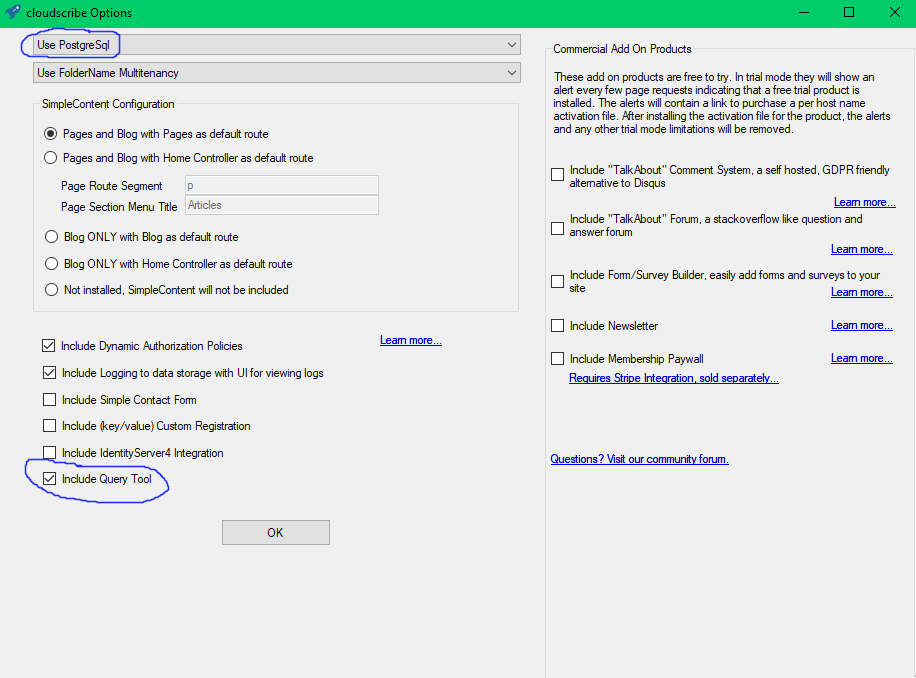
Visual Studio Code or CLI
Make sure you have the cloudscribe template installed:
dotnet new -i cloudscribe.templates
Now create your new project called 'MyProject':
mkdir myProject
cd myProject
mkdir src
dotnet new sln -n MyProject
cd src
dotnet new cloudscribe -Q true -n MyProject
cd ..
dotnet sln add ./src/MyProject/MyProject.csproj
For help on all of the options in the CLI template run:
dotnet new cloudscribe --help
Adding Query Tool to existing cloudscribe projects
You will need to make some changes to your code to include Query Tool. These changes will be specific to your chosen database type. Query Tool supports MSSQL, SqlLite, MySQL and Postgresql. Query Tool will not work with NoDb.
The following example assumes you are using Postgresql. If you are using another database type then you should be able to substitute the other database type names as per the convention used in other parts of the cloudscribe startup code - i.e. substitute PostgreSql with MSSQL,MySql or SQLite.
1. Add the following lines to your project's main .csproj file:
  <ItemGroup>
    <PackageReference Include="cloudscribe.QueryTool.Web" Version="6.0.*" />
    <PackageReference Include="cloudscribe.QueryTool.EFCore.PostgreSql" Version="6.0.*" />
  </ItemGroup>
2. Now run 'dotnet restore' to pull in these packages.
3. If you have not included cloudscribe Dynamic Authorisation Policies in your project, add the following lines to Config/Authorization.cs in the method: public static AuthorizationOptions SetupAuthorizationPolicies ... noting that you should configure the policy requirements to suit your project. There's probably no point creating API endpoints that are restricted to authenticated users in the Administrators role, so the QueryToolApiPolicy might be set to have no requirements, if you will only use it for public API endpoints:
options.AddPolicy(
    "QueryToolAdminPolicy",
    authBuilder =>
    {
        authBuilder.RequireRole("Administrators");
    });

options.AddPolicy(
    "QueryToolApiPolicy", policy =>
	policy.RequireAssertion(context =>
	{
		return true; //allow anonymous
	})
	);
4. Add the following lines to Config/CloudscribeFeatures.cs in the method: public static IServiceCollection SetupDataStorage ...
services.AddQueryToolEFStoragePostgreSql(connectionString: connectionString);
and at the top of that file:
using cloudscribe.QueryTool.Services;
using cloudscribe.QueryTool.EFCore.PostgreSql;
5. Add the following line to Config/CloudscribeFeatures.cs in the method: public static IServiceCollection SetupCloudscribeFeatures ...
services.AddScoped<IQueryTool,QueryTool>();
6. Add the following lines to Program.cs in the method: private static void EnsureDataStorageIsReady ...
QueryToolStartup.InitializeDatabaseAsync(scopedServices).Wait();
and at the top of that file:
using cloudscribe.QueryTool.EFCore.Common;
7. Add a link to the Query Tool page into navigation.xml somewhere within the SiteAdmin section of links:
            <NavNode key="QueryTool"
               controller="QueryTool"
               action="Index"
               text="Query Tool"
               iconCssClass="fas fa-database"
               componentVisibility="breadcrumbs,childtree,parenttree"
               authorizationPolicy="QueryToolAdminPolicy"
               excludeFromSearchSiteMap="true">
              <Children> </Children>
            </NavNode>
8. Add a new database connection string to appsettings.json specifically for Query Tool. In the "ConnectionStrings" section add your connection string:
    "ConnectionStrings": {
        "EntityFrameworkConnection": "Server=yourserver;Port=5432;User Id=youruser1;Password=yourpassword1;Database=yourdbname;",
        "QueryToolConnectionString": "Server=yourserver;Port=5432;User Id=youruser2;Password=yourpassword2;Database=yourdbname;"
    },
See the Permissions section above, but you should use a different username/password here to connect to your database and you should set the permissions for that database user appropriately for your requirements.
Localisation
Query Tool fully supports localisation. New projects from the template come with a resx file in English, and machine translated resx files for a few other languages. These translations will not be perfect!
For existing projects you can download the resx files from Github and place them into the GlobalResources folder within your project.
